After acquiring a Ford F-150 truck last year, I’ve been working on getting a ham radio installed in it. At times, I have loaded up my vehicle with multiple radios covering HF through 70 cm but lately I am content with just having a reasonable dualband 2m/70 cm FM rig in the mobile. Actually, I used a Yaesu FT-8900 that does FM on 10m, 6m, 2m and 70 cm but just set it up for the two bands.
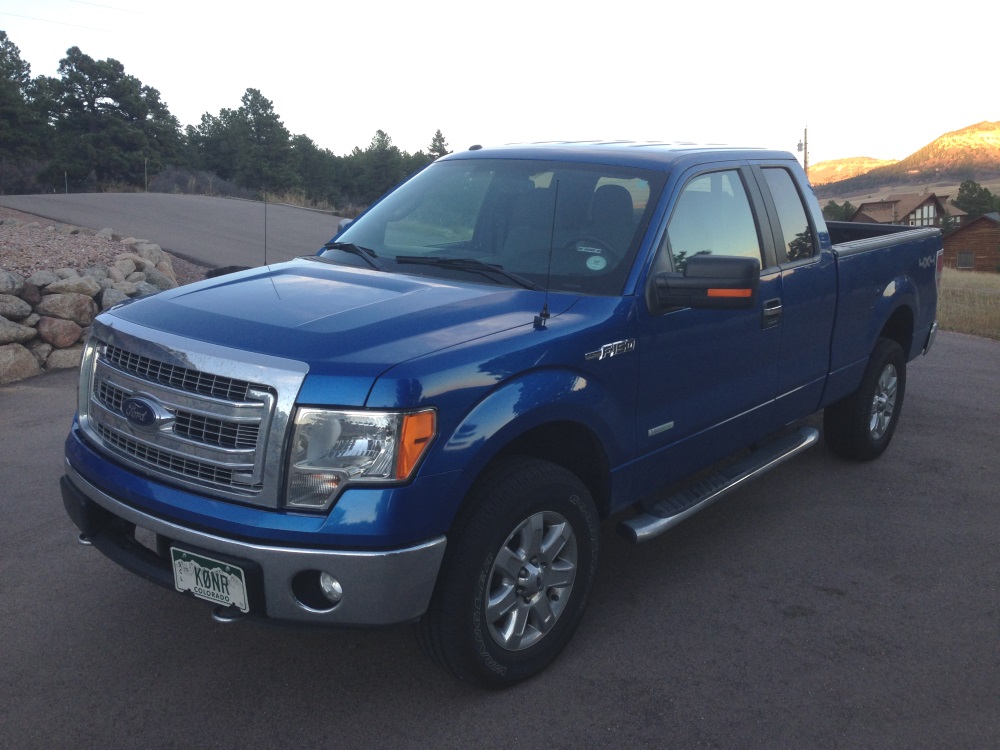
One of the most critical questions for a mobile installation is what kind of antenna to install and where to put it. In the end, the antenna is going to be the main determinant of mobile performance. Ideally, I’d like to have the antenna on the roof of the cab but the truck will not fit in my garage in that configuration. Another option I considered was mounting a longer dualband antenna using one of the stake pocket mounts from Breedlove. I prefer NMO mounts for VHF/UHF antennas and the stake pocket looked like a good way to go. However, a little measuring revealed that a 1/2-wave or 5/8-wave 2m antenna on the stack pocket was not going to clear my garage door. So it seemed that I was limited to a shorter antenna. I may still use the stake pocket mount for an additional antenna for road trips or to add 6m and 10m antennas.
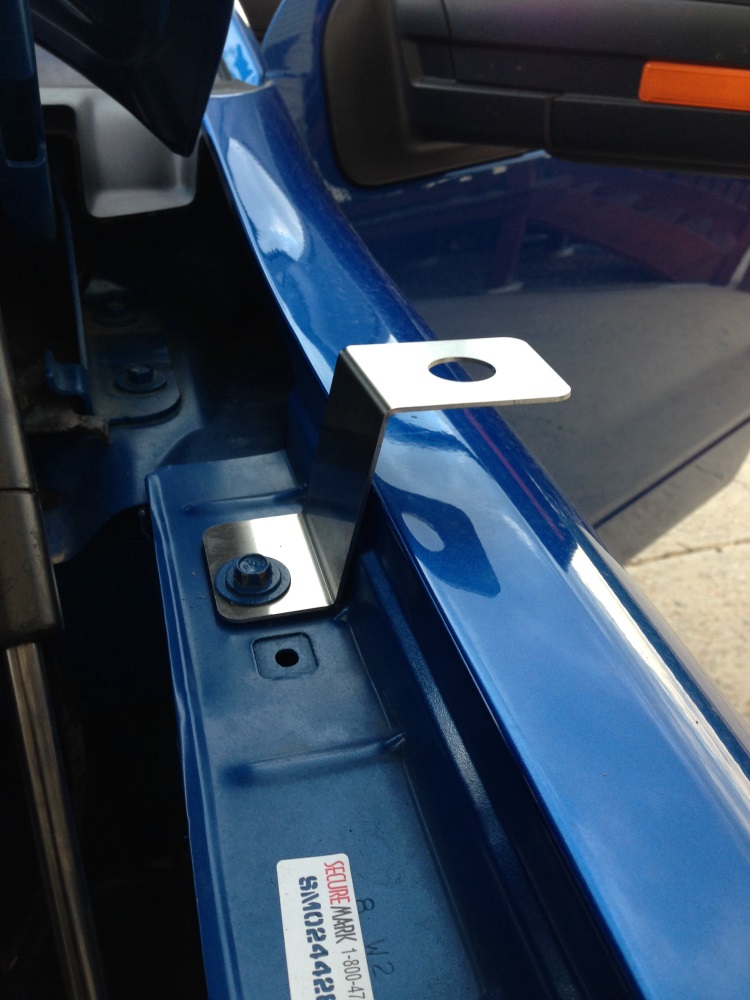
At this point, the F-150 bracket offered by The Antenna Farm looked like a good option. They have a number of these brackets made specifically for various vehicles, so check them out. This made the antenna installation quite simple. <click on any of the photos for a larger view>
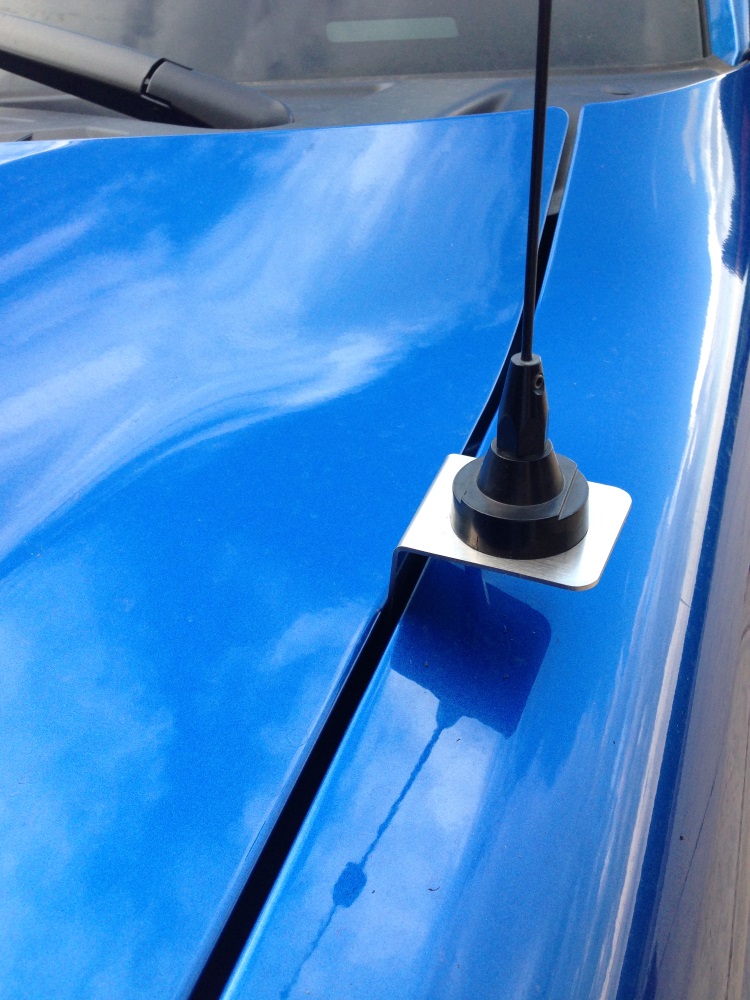
The antenna is an NMO-mount dualband that I had laying around the hamshack. I don’t recall the exact model number but these are very common, about 19-inch long for 1/4-wave operation on 2m and a small loading coil to make it work on the 70cm band.
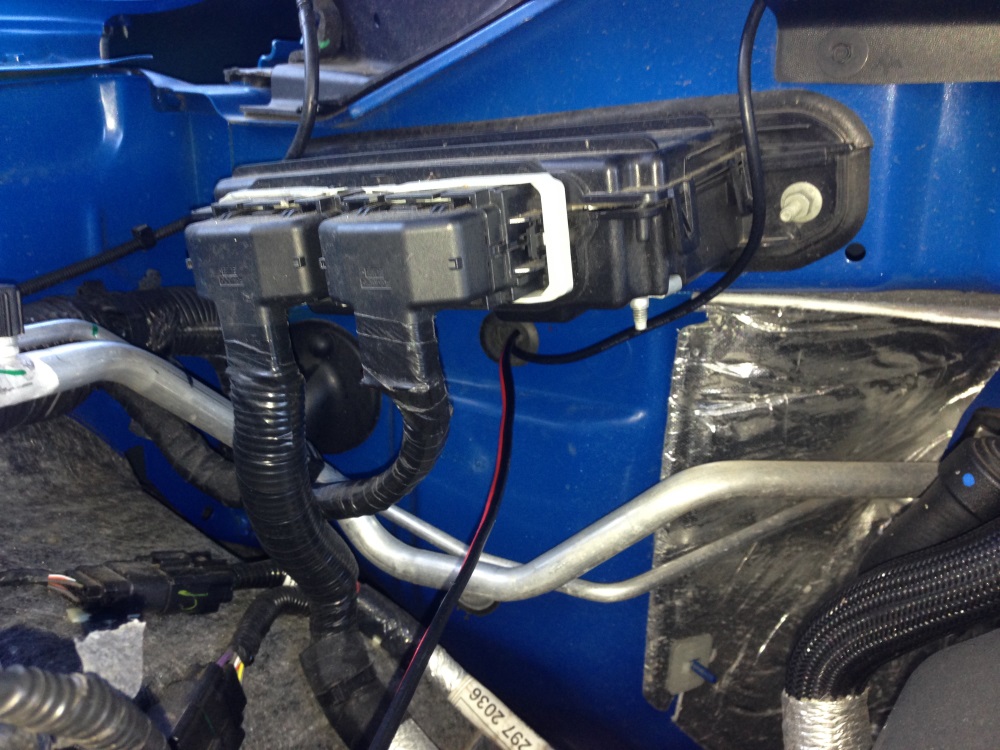
The F-150 has several precut holes for passing wires through the firewall. I used one that is on the passenger side just below a large module, as shown in the photo. It took a stiff wire and some force to punch my way through the rubber plug and into the cab compartment.
I don’t have a photo of the battery connection but I connected the positive lead right onto the battery terminal while the negative lead was attached to the truck chassis near the battery. You may have been told to always connect directly to the battery terminals but that advice no longer applies to some newer cars because there is a current monitoring device in the negative battery lead. To avoid confusing the vehicle battery monitoring system, the negative connection to your transceiver needs to be on the chassis side of the current monitor. Alan K0BG explains this issue on his web site. Actually, Alan has a wealth of information on mobile installations on his web site: www.k0bg.com. Oh, of course, I used inline fuses on both the positive and negative power cables.
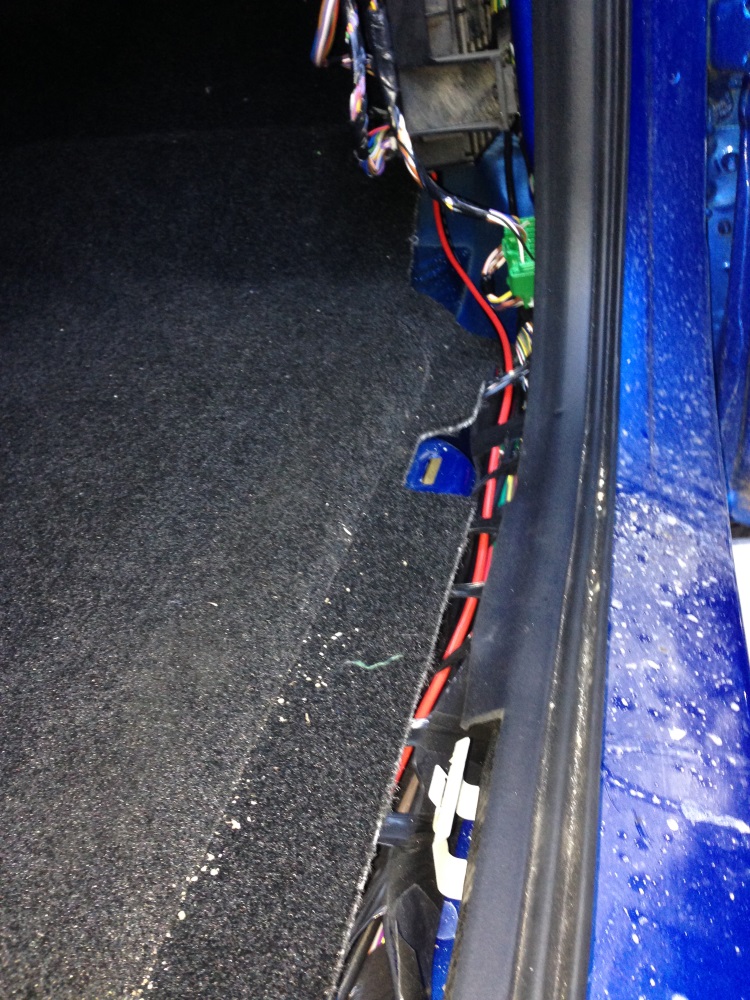
I mounted the FT-8900 transceiver on the floor under the back seat. To route the power cables and antenna coax, I pulled up the flat plastic trim piece that runs along the floor at the passenger door. I started from the front and did some careful prying (and praying) to remove the trim without breaking it. This exposes a trough with a factory wiring harness in it but there’s room for more. A few other plastic trim pieces were removed to get access to the wires coming through the firewall. All in all, this was not that difficult. (Yea, Ford!)
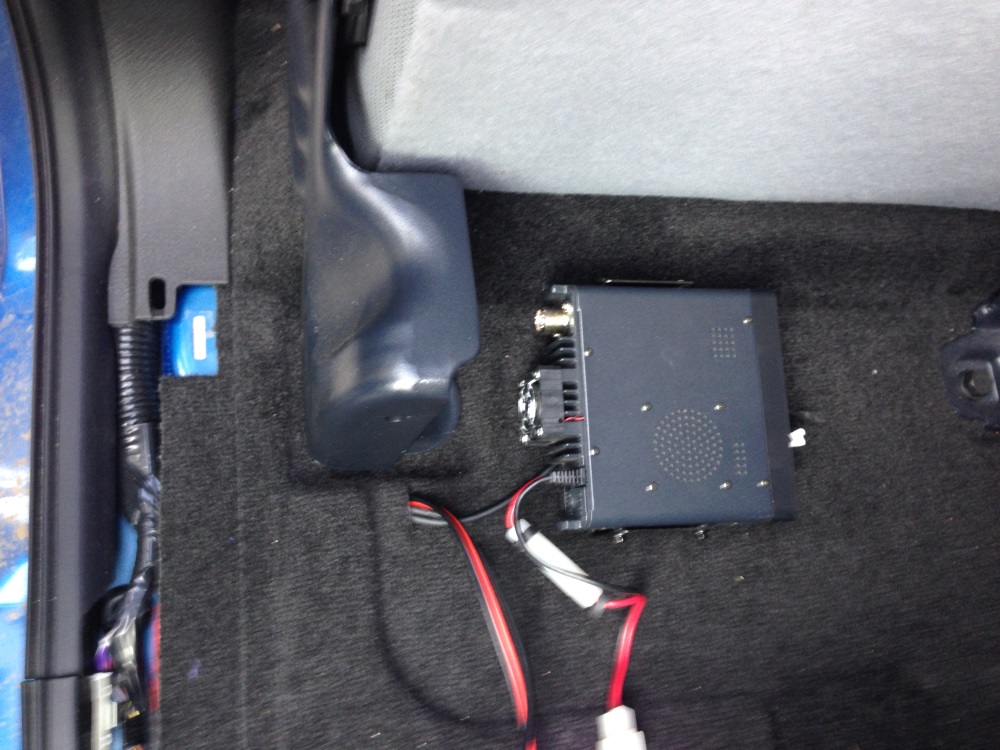
The photo to the left shows the FT-8900 radio installed under the passenger side rear seat. I drilled holes through the floor and mounted the radio with hefty sheet metal screws. The screws go right through the metal floor and and can be seen from under the truck. (Check that out before drilling!) Because the radio body is under the rear seat, I am using a small external speaker mounted near the drivers seat.
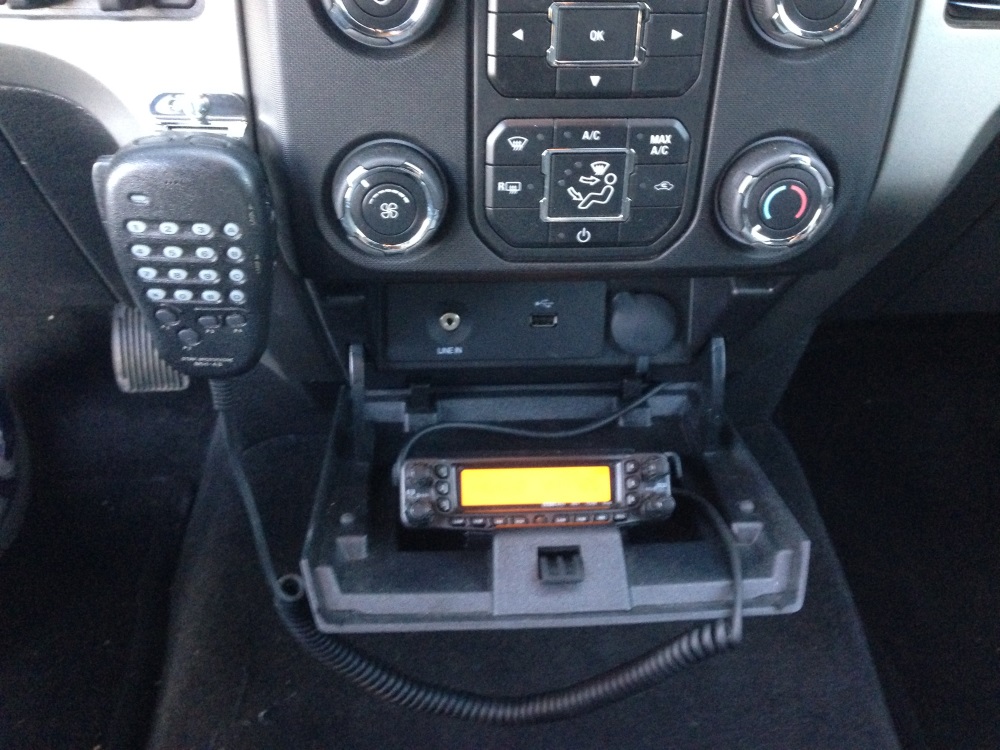
The radio control head is mounted inside a little door/shelf that normally pops open to reveal the USB port for plugging in a smartphone. (Note that Ford has multiple seat / dashboard configurations.)
 The FT-8900 control head just fits inside this little shelf, even when the door is closed (see photo). The microphone does have to be removed to close the door. I mounted a microphone hanger with a couple of sheet metal screws, as shown in the photo. I don’t like the crappy little hanger that usually comes with a ham transceiver so I bought some higher quality hangers on Amazon.
Overall, I am pleased with the radio install. The antenna location is clearly a compromise and I notice the performance is not as good as my previous vehicle (which was a small SUV with an NMO mount antenna in the middle of the roof.) But the antenna is “low profile” and sufficient for “around town” mobile operating. I am getting a little noise on the 2m band which needs some investigation. The 70cm band is very clean and is the band I use the most.
73, Bob K0NR
Bob, You could have used the Moxon fold-down antenna mount. This would allow you to use a taller antenna. I used one on Wife’s Subarau, attached at the roof rack. Works like a champ. I do use a small whip in town, but change over to a longer whip when on road trips.
Tom,
I don’t see a “Moxon fold-down antenna mount” anywhere. Perhaps you mean the Maldol mount?
Bob K0NR